I wrote my
Windows 8.1 review using a virtual machine on my iMac, running MacOsX 10.9 Mavericks and using the Windows 8.1 official preview (
no longer available online for download). To virtualize the new Windows operating system I've used two different programs: Parallels Desktop 9 and
VirtualBox. My version of Parallels Desktop showed some issues accessing the iMac folders from the virtual machine and so I switched to VirtualBox. I've been very impressed by the latter one, it's easy to install but there are two downsides as compared with Parallels Desktop. In Parallels Desktop the folders on the host system (MacOsX in my case) are immediately accessible following the installation process (from
My Computer or from
Network), while VirtualBox requires the user to go through some additional settings and this process isn't intuitive. Another downside is VirtualBox requires to create a virtual partition on the hard disk and it's more demanding in terms of disk space. These drawbacks are anyway balanced by cost (
VirtualBox is free,
Parallels Desktop costs $79.99, or $49.99 if you upgrade from an older version) and performance (VirtualBox works much more smoothly, at least in my experience, and it's less resource-draining on the host system).
How to virtualize Windows 8.1 on MacOsX Mavericks using VirtualBox
Why you want to do that
- Stay current (you like to play with the latest gadgets or, like myself, that's your job)
- utilize on your mac software that couldn't run on MacOsX, because it can be installed only on Windows
- First step: Windows 8.1 download
After installing VirtualBox on your mac, get a copy of the
official Windows 8.1 release online from Microsoft website: you'll need a valid Windows 8 serial number to download it .
LEGAL DISCLAIMER: Cracked copies of the new Windows 8.1 release version have already leaked but I won't give you the links to download them, nor I encourage software piracy on this blog.
- Second step: creating a new Virtual Machine
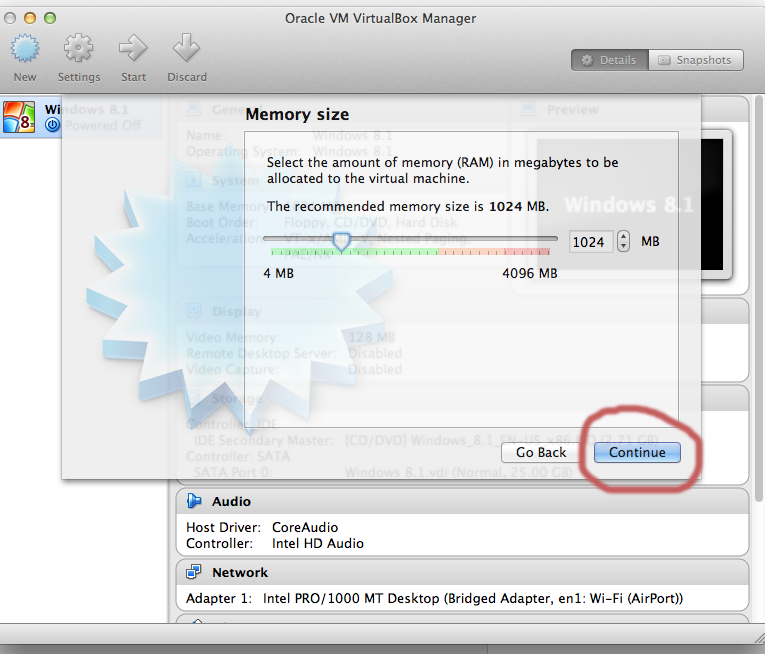
From the VirtualBox interface, click
New and assign your Virtual Machine a name (in my case it's
Windows 8.1). Then choose the amount of RAM to utilize and click
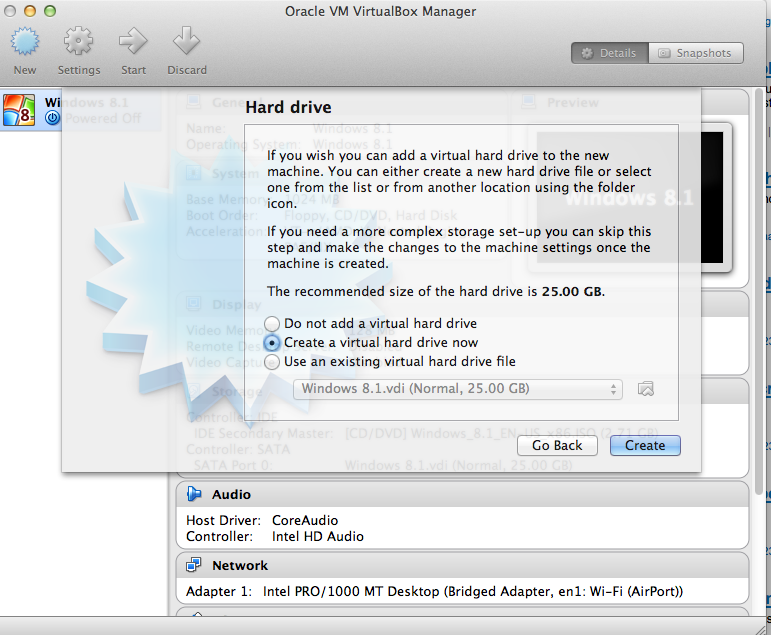
Continue (see Picture 1). At this point you'll be requested to setup a virtual hard drive (
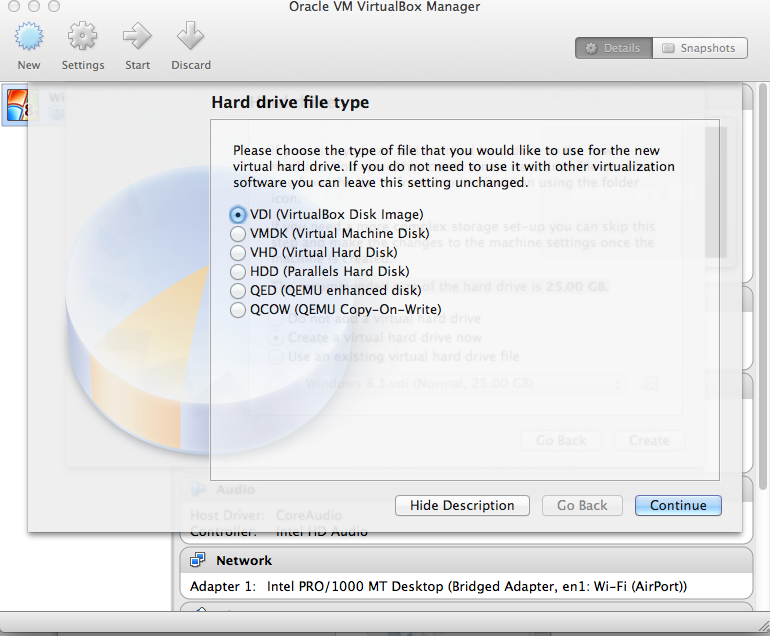
see Picture 2). Next, you'll be prompted to choose a file type; if you don't have particular needs, stick to the default settings (
see Picture 3). Do the same for the next screen. Set a file location and the desired size of your virtual machine and click on
Create button (
Picture 4). At this point your virtual machine will be ready to install and you'll find yourself in a new screen; click on
Start and your installation process will begin (
Picture 5). It takes place the exact same way as installing a new operating system on a physical computer. If you have any doubts or get stuck in the process, check the
official guide.
 |
| Picture 1 |
 |
| Picture 2 |
 |
| Picture 3 |
 |
| Picture 4 |
 |
| Picture 5 |
Third step: setting up the network and accessing the host system folders

|
| Picture 6 |
Once the setup has been completed, click on the
Settings button in the main VirtualBox interface and open the
Network tab (
Picture 6). From the drop-down menu, set the type of network adapter to "
Bridged Adapter" (the default setting is
NAT). This operation is necessary to access the host folder system. In other words if you want to access the files you have in your MacOsX folders from your virtual machine (i.e. from Windows Explorer) you have to choose this option, otherwise the two system will be completely separated (look
here for more details).
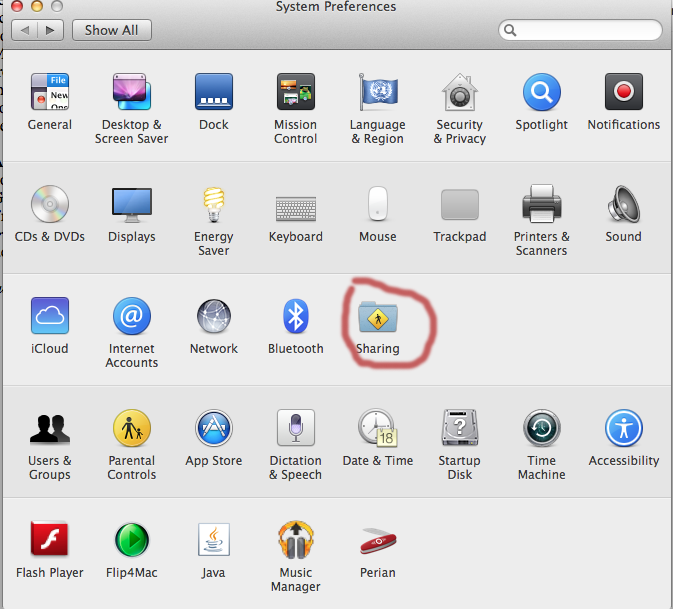
At this point, we gotta work on MacOsX (the host operating system in this case).
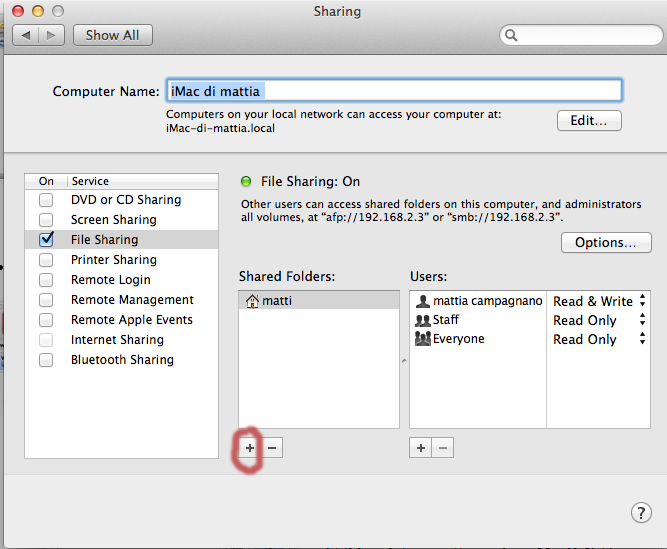
Go to System Preferences and open
Sharing (Picture 7). From there, enable
File Sharing flagging it with your mouse (
see Picture 8) and then, in the
Shared folders pane, click on the "
+" button to add a folder to be shared
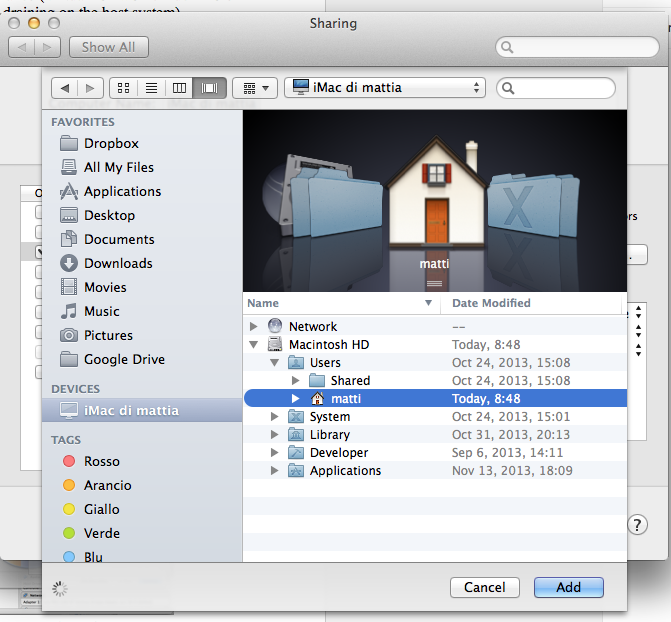
. In the next window,
look for your user folder, select it and click
Add to share it (
Picture 9). The last thing to do about the File Sharing window is opening up
Options (
see Picture 8 as a reference) and making sure that
"Share files and folders using SMB" is enabled.
 |
| Picture 7 |
 |
| Picture 8 |
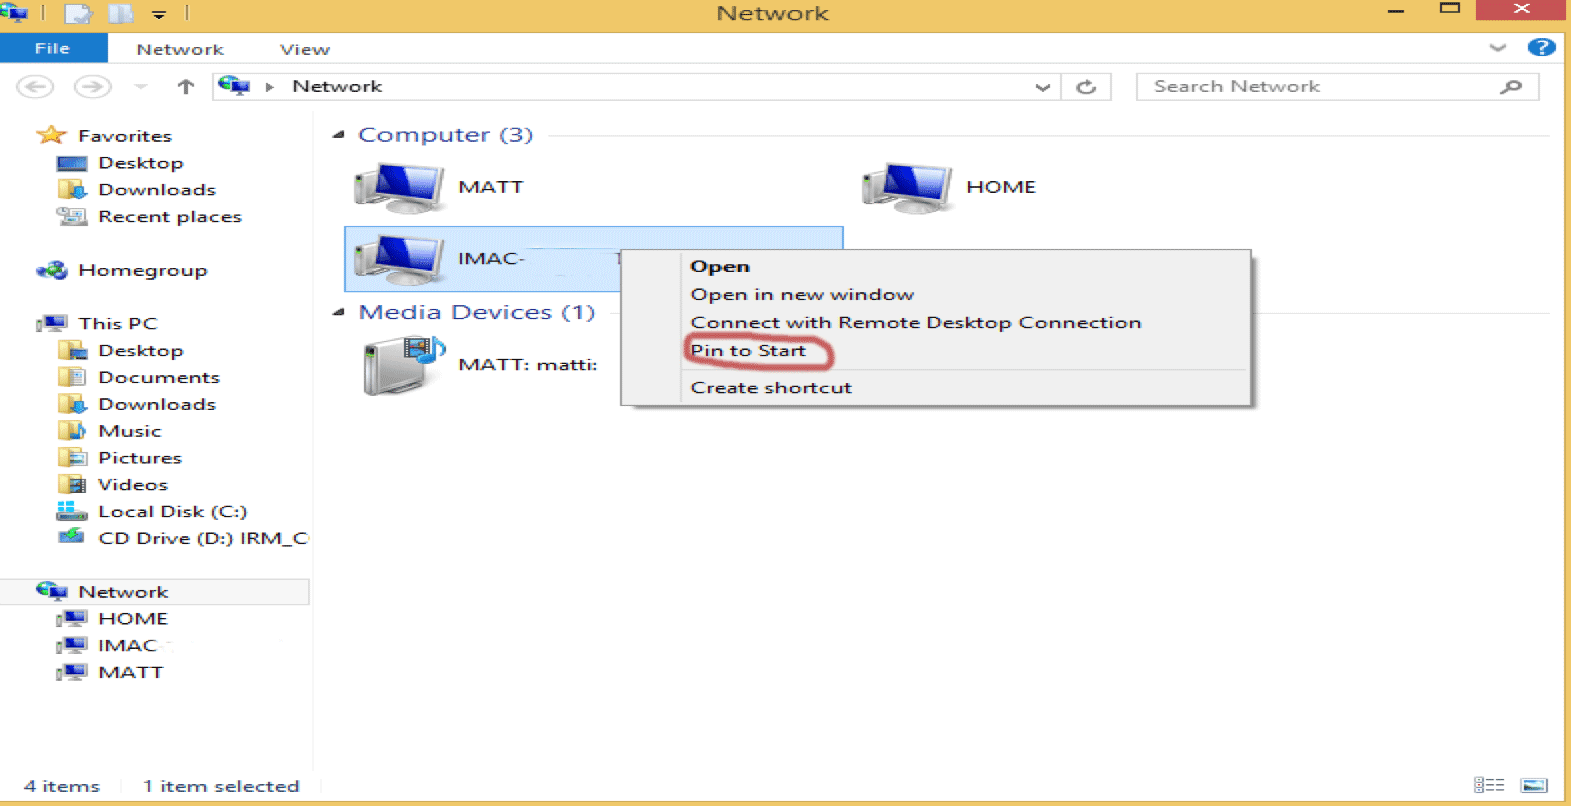
After all these operation have been completed, let's check out on the Windows 8.1 virtual machine. Switching to Desktop Mode and opening up
Network you see a new network connection (
IMAC) to your host system, so you look good. Right-clicking this connection and choosing
Pin to Start, you can add a shortcut to it in the tile interface (
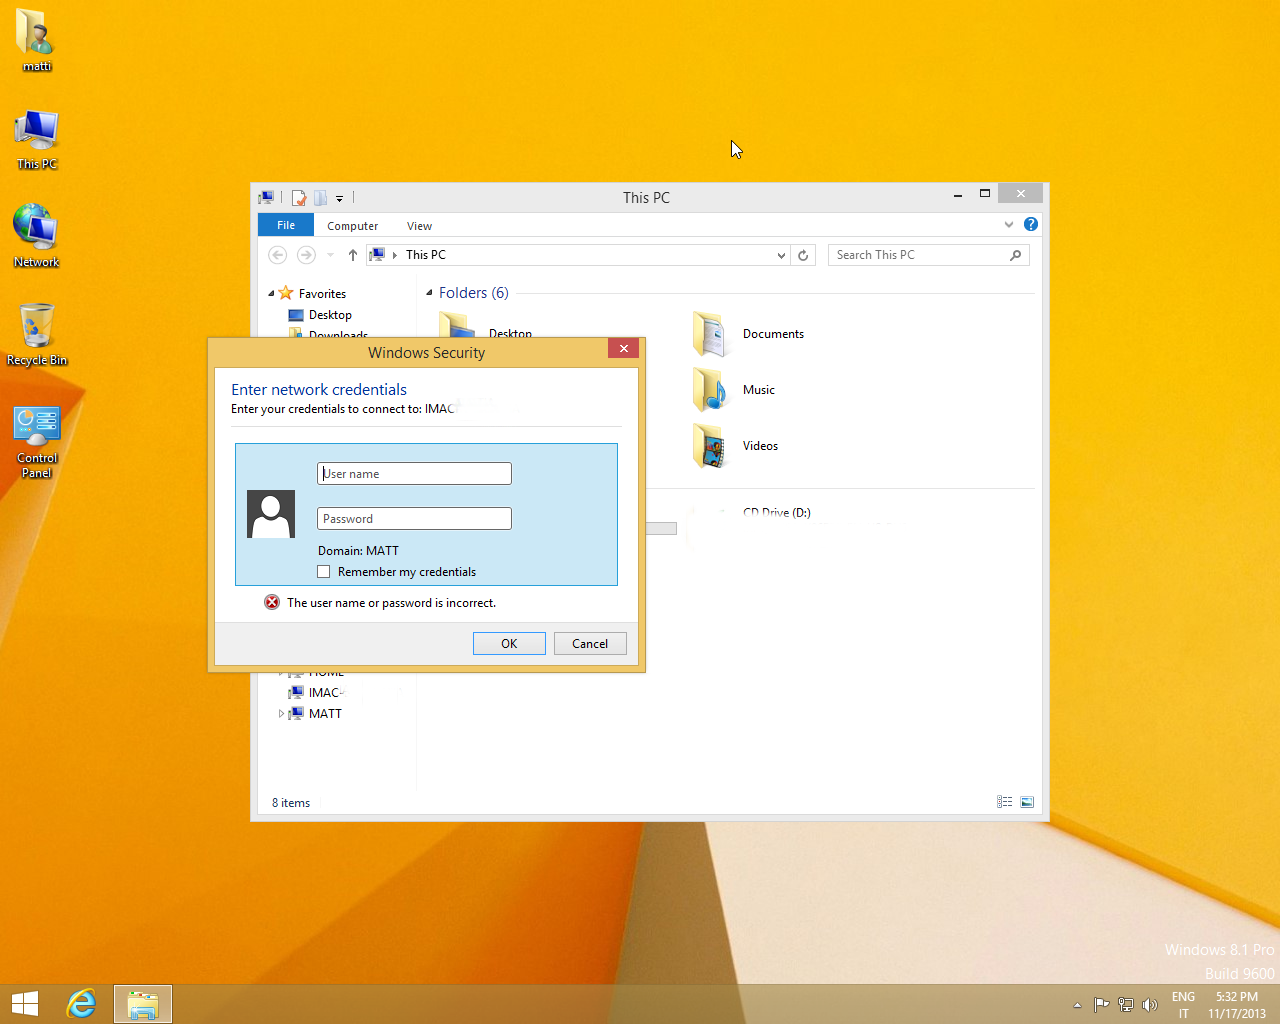
Picture 10). Open up
IMAC Connection double-clicking on it. You'll be requested your username (the iMac username) and the iMac administrative password (
Picture 11).
 |
Picture 10
|
 |
| Picture 9 |
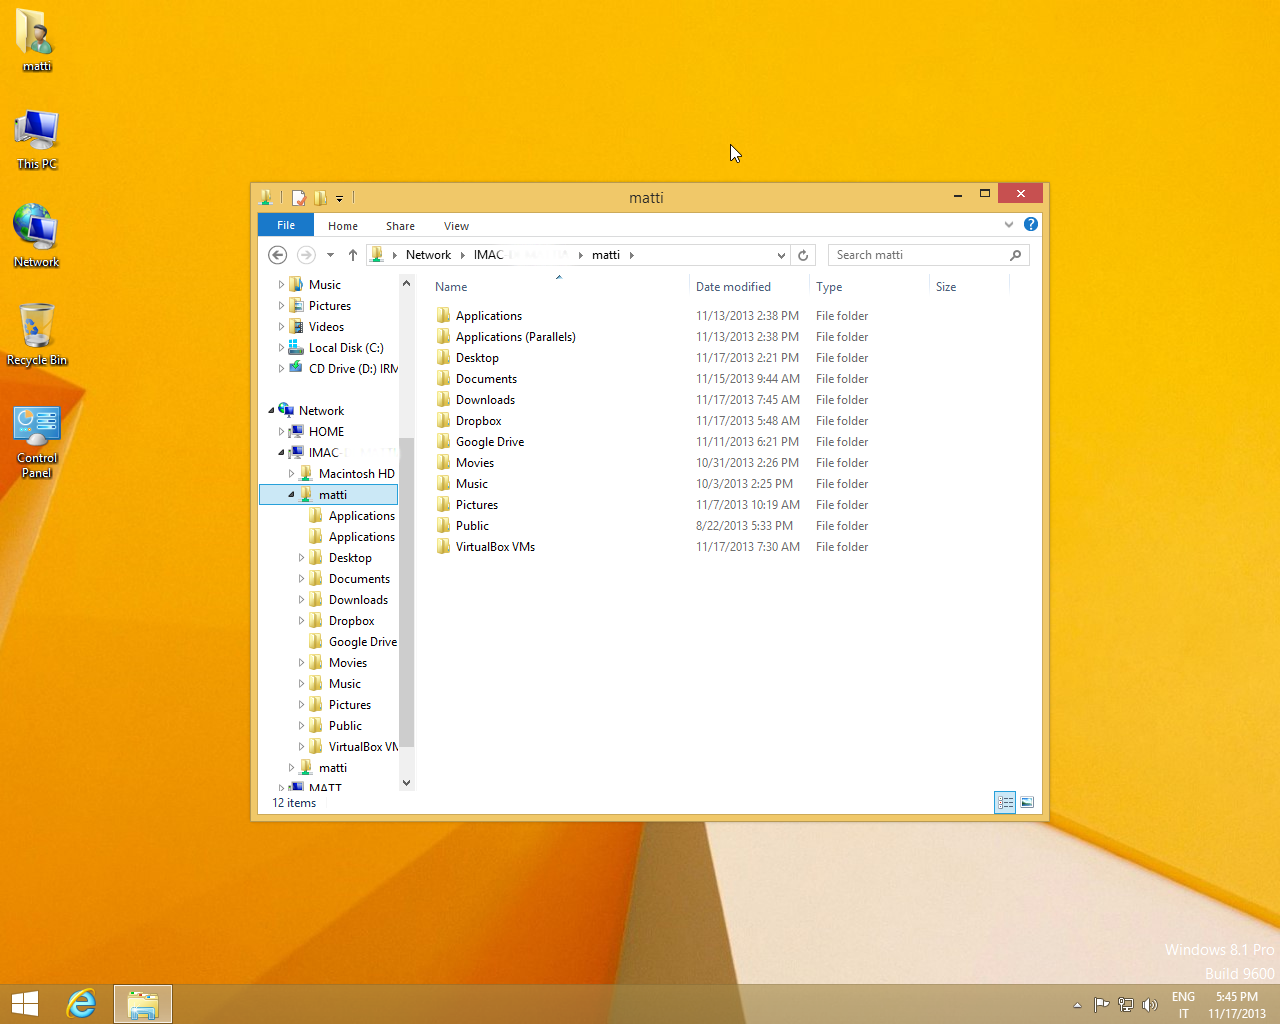
After entering your correct credentials, you'll be allowed to logon to your iMac and to access its files from the Windows Virtual Machine (
Picture 12).
I hope you've enjoyed this trip!
 |
| Picture 11 |
 |
| Picture 12 |


Comments
Post a Comment